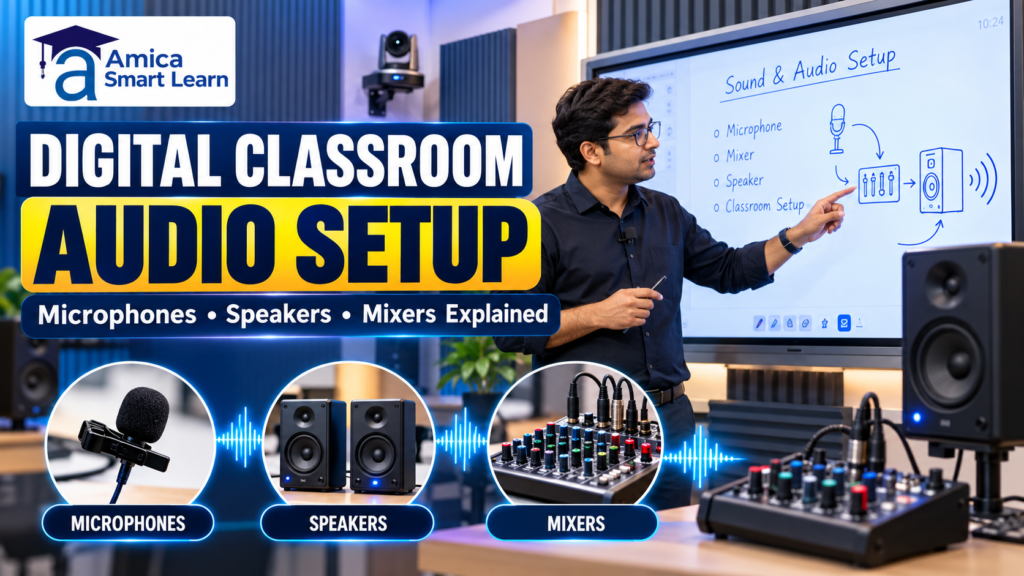
Digital Classroom Audio Setup: Microphones, Speakers & Mixers Explained
In an era where education increasingly transcends physical boundaries, the quality of digital classroom audio setup has become paramount. Whether you’re operating a fully remote learning environment or managing a hybrid classroom model, crystal-clear audio ensures that students remain engaged and can absorb educational content without distractions. A proper Digital classroom audio setup encompasses multiple interconnected components working in harmony to deliver exceptional sound quality.
At Amica Smart Learn, we understand that investing in the right audio infrastructure is not merely about acquiring equipment—it’s about creating an environment where knowledge flows seamlessly. This comprehensive guide explores every aspect of digital classroom audio setup, from microphone selection to mixer configuration, helping educators and institutions make informed decisions.
Why Clear Audio Matters in Digital Classrooms
Clear audio is the backbone of effective digital learning. Research consistently demonstrates that students retain information significantly better when audio quality is superior. When microphones pick up muffled speech or speakers reproduce distorted sound, student comprehension drops dramatically.
Digital classroom audio setup directly impacts:
- Student Engagement: Crystal-clear audio keeps learners focused and reduces cognitive load
- Content Retention: Better sound quality correlates with improved information retention
- Instructor Confidence: Teachers communicate more effectively with reliable audio
- Accessibility: Professional audio benefits students with hearing challenges through better clarity
- Recording Quality: If you’re capturing lectures, superior audio ensures archival materials remain useful
Poor audio in digital learning environments creates a ripple effect that undermines the entire educational experience. This is why Amica Smart Learn’s educational technology platform emphasizes audio quality as a core component of digital classroom infrastructure.
Essential Components of a Classroom Audio System
A comprehensive digital classroom audio setup consists of several key components:
- Microphones – Capture instructor and student voices
- Speakers/Monitors – Reproduce audio for classroom participants
- Audio Mixers – Control and balance multiple audio inputs
- Cables and Connectors – Transmit audio signals reliably
- Amplifiers – Boost signal strength when necessary
- Audio Interfaces – Convert analog signals to digital formats
- Soundproofing Materials – Minimize external noise interference
Each component plays a critical role. Even if one element underperforms, the entire digital classroom audio setup suffers. This interconnected nature makes proper planning essential before purchasing equipment.
How to Choose the Right Classroom Microphone
Selecting the ideal microphone for your digital classroom audio setup requires considering several factors:
Classroom Size: Larger classrooms may need microphones with greater directional focus or multiple mics coordinated through a mixer.
Teaching Style: Instructors who move around need wireless systems, while stationary lecturers can use desktop options.
Budget Constraints: Quality classroom microphones range from $50 to $500+. Entry-level USB options provide good value, while professional condenser models justify higher costs through durability and sound quality.
Integration Requirements: Your digital classroom audio setup must connect seamlessly with your existing video conferencing platform, whether that’s Zoom, Teams, Google Meet, or proprietary learning management systems.
Ambient Noise Levels: Noisier environments benefit from dynamic microphones with superior rejection, while quiet rooms can utilize sensitive condensers.
Amica Smart Learn recommends consulting with audio professionals when designing your digital classroom audio setup to ensure all components work harmoniously.
What Is an Audio Mixer and How Does It Work?
An audio mixer is the command center of your digital classroom audio setup. It serves as the central hub where multiple audio sources (microphones, computers, video feeds) are combined, balanced, and routed to outputs.
Core Mixer Functions
Input Channels: Each channel accepts a separate audio source. A mixer with 8 channels can manage 8 simultaneous microphone or line inputs.
Gain Control: Adjusts signal strength for each input, ensuring optimal levels without distortion.
Equalization (EQ): Shapes frequency response to enhance clarity and reduce problem frequencies.
Faders: Master volume controls that adjust individual channel and overall output levels.
Effects Processing: Some mixers include reverb, compression, and other effects to enhance audio quality.
Types of Mixers for Classrooms
Analog Mixers: Traditional, hardware-based units with physical knobs and faders. Reliable and straightforward but less flexible.
Digital Mixers: Software-based or hybrid units offering extensive control, preset storage, and integration capabilities. Ideal for complex digital classroom audio setup scenarios.
USB Mixers: Compact units connecting directly to computers, perfect for remote teaching and recording applications.
How Is the Installation Process Done?
- Site visit and planning – The installation team checks the room size, wall type, and electrical points to decide the best position for the board and lights.
- Mounting the board and stand – The interactive flat panel is fixed on a movable stand or wall mount for easy height adjustment.
- PC and monitor setup – The studio PC is connected to the board and secondary monitor with proper cabling (HDMI, USB-C, VGA as needed).
- Camera and lighting placement – The Evota camera and Havens lights are positioned for the best angle and even lighting.
- Audio configuration – Wireless and cable mics are paired and tested for clear sound.
- Software and testing – Apps, drivers, and connectivity (Wi-Fi 6, Bluetooth) are configured, followed by a full test run.
This process usually takes one to two days, depending on the room and the number of devices being installed.
Understanding Classroom Audio Signal Flow
Effective digital classroom audio setup requires understanding how audio travels through your system:
Microphone (Input) → Mixer → Amplifier → Speakers (Output)
This basic flow ensures:
- Sound is captured at the source
- Multiple sources are combined and balanced
- Signal is amplified to adequate levels
- Audio is reproduced for classroom participants
In modern digital environments, this flow includes:
- Computer audio routing to mixer
- Streaming platform integration (Zoom, Teams)
- Recording equipment synchronization
- Backup systems for reliability
Understanding this signal path helps troubleshoot problems when they arise and ensures your digital classroom audio setup operates optimally.
How to Prevent Echo, Feedback and Background Noise
Audio problems undermine even the best digital classroom audio setup. Here’s how to prevent common issues:
Echo Prevention
- Use directional microphones to reduce room reflections
- Implement acoustic treatment on hard walls
- Position speakers away from microphone pickup zones
- Utilize echo cancellation features in video conferencing software
Feedback Elimination
- Keep microphone levels below unity gain
- Maintain adequate speaker-to-microphone distance
- Use gain structure principles during setup
- Install foam windscreens on microphones
- Employ automatic feedback suppressors in mixers
Background Noise Reduction
- Select cardioid or hypercardioid pattern microphones
- Use noise gates to mute channels when dormant
- Install acoustic panels in recording areas
- Employ noise reduction software during streaming
- Schedule classes during quieter building hours when possible
These preventive measures are essential components of a professional digital classroom audio setup.
Audio Setup for Online and Hybrid Classes
Hybrid learning requires specialized digital classroom audio setup considerations. The system must serve simultaneous in-person and remote participants with equal quality.
Requirements for Hybrid Classrooms:
- Multiple microphones capturing instructor and student voices
- Network connectivity for seamless integration with video platforms
- Redundant systems ensuring continuity if primary equipment fails
- Echo cancellation preventing feedback between in-room and remote speakers
- Recording capability for asynchronous learners
- Low-latency connections minimizing delay between speech and delivery
Hybrid digital classroom audio setup is more complex than either fully remote or fully in-person configurations, requiring careful planning and professional installation.
Audio Setup for Lecture Recording and Live Streaming
Recording and streaming add layers of complexity to your digital classroom audio setup:
Recording Considerations:
- Higher bit-rate audio capture (at least 16-bit, 44.1kHz)
- Direct outputs from mixers to recording devices
- Backup recording systems for critical content
- Separate recording feeds from video streams
- Post-production audio editing capabilities
Streaming Requirements:
- Stable internet connectivity for reliable streaming
- Compression settings balancing quality and bandwidth
- Backup internet connections preventing stream drops
- Real-time monitoring of stream quality
- Integration with platforms like YouTube, Twitch, or proprietary LMS systems
A comprehensive digital classroom audio setup accommodates these dual needs through strategic equipment selection and configuration.
Audio Solutions for Small, Medium and Large Classrooms
Different-sized spaces require different approaches to digital classroom Audio setup:
Small Classrooms (Capacity: 20-30 students)
- Single quality condenser or dynamic microphone
- Powered speakers or small PA system
- Basic 4-channel mixer
- USB audio interface for recording
- Estimated investment: $1,500-$3,000
Medium Classrooms (Capacity: 30-100 students)
- Multiple microphone types (lapel wireless + boundary mics)
- Ceiling-mounted speaker array
- 8-channel professional mixer
- Recording and streaming capability
- Estimated investment: $3,000-$8,000
Large Auditoriums (Capacity: 100+ students)
- Professional-grade microphone array
- Multi-zone speaker system
- 16+ channel digital mixer
- Separate recording and streaming infrastructure
- Professional audio engineer oversight
- Estimated investment: $8,000-$25,000+
| Classroom Size | Microphones | Speakers | Mixer | Budget |
|---|---|---|---|---|
| Small | 1 quality mic | Powered PA | 4-channel | $1.5-3K |
| Medium | Multiple types | Ceiling array | 8-channel | $3-8K |
| Large | Professional array | Multi-zone | 16+ channel | $8-25K+ |
Wired vs Wireless Classroom Audio Systems
Your digital classroom audio setup choice between wired and wireless systems impacts flexibility, reliability, and cost:
Wired Systems
Advantages:
- No interference or dropouts
- Simple setup and troubleshooting
- Lower cost
- Unlimited battery life
Disadvantages:
- Restricted mobility
- Cable management complexity
- Potential trip hazards
- Less flexible classroom configurations
Wireless Systems
Advantages:
- Instructor and student mobility
- Flexible classroom layouts
- Professional appearance
- Future-proof scalability
Disadvantages:
- Potential interference issues
- Battery management required
- Higher cost ($500-$2,000+ per wireless mic)
- Channel coordination in multi-mic setups
Most professional digital classroom audio setup implementations use hybrid approaches: wired stationary mics combined with wireless lapel options for maximum flexibility.
Common Classroom Audio Setup Mistakes
Avoid these pitfalls when implementing your digital classroom audio setup:
- Insufficient Planning: Failing to assess classroom acoustics and requirements before purchasing equipment
- Undersized Equipment: Selecting speakers or mixers inadequate for classroom size, leading to audio distortion
- Poor Microphone Placement: Positioning mics too far from speakers or in high-ambient-noise areas
- Neglecting Cables: Using cheap, low-quality cables that introduce noise and interference
- Overlooking Acoustics: Ignoring room design factors that degrade audio quality despite quality equipment
- Inadequate Testing: Failing to test the digital classroom audio setup before critical classes or recordings
- Skipping Training: Not properly training instructors on equipment operation and troubleshooting
- Ignoring Maintenance: Failing to perform regular equipment maintenance and updates
How to Choose a Professional Classroom Audio Setup Company
Selecting the right vendor significantly impacts your digital classroom audio setup success:
Evaluation Criteria:
- Experience: Seek companies specializing in educational audio with numerous classroom installations
- Local Support: Ensure they provide ongoing maintenance and technical support in your area
- Equipment Quality: Verify they use professional-grade components from reputable manufacturers
- Portfolio: Review case studies and examples of similar-sized classroom installations
- Training: Confirm they offer comprehensive operator training for staff
- Warranties: Understand equipment warranties and service agreements
- Scalability: Ensure they can support future expansion within your institution
- References: Contact existing customers about their satisfaction with digital classroom audio setup implementations
Professional installation ensures your system achieves optimal performance from day one. Amica Smart Learn partners with experienced audio specialists who understand both technology and educational environments.
Conclusion
Establishing a professional digital classroom audio setup represents a significant investment in your educational institution’s future. The components we’ve explored—from microphone selection through speaker placement to mixer configuration—work together to create an audio environment where learning flourishes.
Quality audio isn’t a luxury feature; it’s an essential foundation for effective digital learning. Students deserve crystal-clear instruction, and instructors need reliable technology enabling confident delivery. When all elements of your Digital classroom audio setup function harmoniously, the focus shifts entirely to educational content rather than technical difficulties.
Amica Smart Learn recognizes that today’s educational landscape demands sophisticated audio infrastructure. Whether you’re designing your first classroom audio system or upgrading existing equipment, the principles outlined in this guide will lead you toward making informed decisions that serve your institution for years to come.
Frequently Asked Questions
Q: What's the minimum microphone quality needed for online teaching?
A: USB condenser microphones (Audio-Technica AT2020 or equivalent) provide professional quality for remote teaching at budget-friendly prices ($100-$150).
Q: Can I use consumer-grade speakers for a classroom?
A: While possible for small spaces, professional speakers deliver superior consistency and reliability. Consumer speakers often lack the power and directional characteristics classrooms require.
Q: How many microphones does a classroom need?
A: This depends on classroom size and layout. Small classrooms may need one quality microphone, while medium spaces typically use multiple mics capturing instructor and student voices.
Q: What's the ideal speaker placement in a classroom?
A: Position speakers away from microphone pickup zones to prevent feedback. Typically, mounting speakers at the front-center or distributed ceiling installation works best.
Q: How do I eliminate audio feedback?
A: Reduce microphone sensitivity, position speakers away from mics, use microphones with supercardioid patterns, and implement proper gain structuring in your mixer settings.